TABLE OF CONTENTS
Overview
NexSIS is the connection between an external system - like a Student Information System (SIS), a Human Resource Information System (HRIS), or a Customer Relationship Management system (CRM) - and Moodle. It is an integration that allows for data exchange from the external system to the LMS. It can be used by any one who needs to sync data from an external system into their LMS as long as they have an external system that outputs information in a CSV format or has the ability to write API calls.
NexSIS is a proprietary tool. If you have not contracted with Moodle to use the NexSIS plugin, please reach out to your Account Manager directly or submit a support ticket to request that your Account Manager connect with you about the viability of using NexSIS for your unique needs.
This guide will walk you through setting up NexSIS from start to finish. If you aren't connecting for the first time and are reading this for troubleshooting or specific help, you can use the Table of Contents to navigate directly to the topic of your choosing.
User Manual
If you have purchased NexSIS, Moodle staff will ensure that the latest release of the plugin has been installed on your site. The remainder of this guide can be used to further acclimate to use of the tool as well as to confirm that it is set up correctly and you are leveraging all of its capabilities.
If you find that your site is not using the latest version of NexSIS, please reach out to your Support representative to request an update. This can be done by submitting a support ticket to Moodle.
Once the NexSIS plugin has been installed, the process of syncing data from one system to the other follows one of two routes:
Files
If you are using SFTP, Moodle will take care of creating the credentials and path needed for you to use SFTP to transfer files. Upon completion of that task, Moodle will share the credentials with you so that you can connect to your preferred secure file transfer system. After that, the process generally moves through the following steps:
Your external system (SIS/ HRIS/ CRM) exports up to nine CSV files for users, courses, enrollments, metalinks, course completions, job assignments, direct managers, programs, and/or certifications.
You upload the CSV file(s) directly to the web server through secure file transfer protocol (SFTP).
Your Moodle site detects the CSV file(s), updates the site with their content, and archives the file(s).
Note: This process can be entirely automated and set to run at regularly scheduled times. Once you complete the initial configuration of the integration, you can let it run automatically.
If you are just setting NexSIS up for the first time, now is a great time to connect to your secure file transfer system using the credentials provided by Moodle. After you have done this, please continue through the guide.
As an alternative to SFTP, you can also upload files using the NexSIS Files Page or NexSIS Web Service. CSV files uploaded through these methods must be formatted in the same format outlined in this documentation. You may use any or a combination of all these methods to upload files.
API calls
If you are using API calls to push data to Moodle, you should review our documentation on NexSIS API.
Plugin Enablement
Before you begin sending API calls or creating CSV files for NexSIS to use, you will need to configure the NexSIS plugin settings on your site.
To begin, go to Site Administration, then Plugins, then Enrollments, and then Manage enroll plugins. Then find NexSIS in the table of plugins and click the crossed-out eye icon to enable the plugin.

Once the plugin is enabled, click the Settings link.

The NexSIS settings page is divided into four tabs: General, API, Files, and Ethos.
This guide will focus on the General and Files tabs. If you need help with the API tab, please see the API specific documentation. If you intend to send CSVs through SFTP you absolutely must enable the setting in NexSIS so that this is possible. This setting is found under Site administration > Plugins > Enrollments > NexSIS > Files.
General settings
The settings configured in the General tab affect the NexSIS plugin sitewide, which means that both API and flatfile integrations check these settings when running.
Setting | Options | Explanation |
Log level | None, Fatal, Error, Warning, Info, Debug | How much information you want to see in the logs, which are found when navigating to Site Administration > Reports > NexSIS logs.
Setting this value to Debug will show the maximum available log information every time NexSIS runs. |
Log clock
| 12-Hour Clock, 24-Hour Clock
| Controls where 12-Hour Clock or 12-Hour Clock is used on NexSIS Logs page.
|
Log retention period
| Number of days
| Log retention period in days. The default is 30 days. Enter 0 to disable all log deletion.
Note: if you are processing very large files it is not recommended that you set log retention period to 0 due to the large amount of data that would retain. |
Archive file retention period
| Number of days
| Archive file retention period in days. The default is 30 days. Enter 0 to disable all archive file deletion. |
Course ID field | shortname, idnumber | This is the field in your file that NexSIS uses to uniquely identify courses (i.e. are you identifying courses to sync to Moodle by ID number or shortname?
Note: In Moodle, course shortnames must be unique, but idnumbers do not need to be unique.
Note: If your idnumber field is not unique, please consider using shortname. |
User ID field | idnumber, username, email | This is the field in your file that NexSIS uses to uniquely identify users.
Note: In Moodle, usernames must be unique; emails can optionally be unique; idnumbers do not have to be unique.
Note: If your idnumber field is not unique, please consider using username. |
Default role | Student, Parent, Non-editing Teacher, Teacher, Manager | The role that will be assigned to users when processing the enrollments.csv file or using the enroll API endpoint if no explicit role is provided in the roleid column.
Note: the menu of options displayed to you in your Moodle site will show all roles that have ‘course’ as a context in which they can be assigned. |
Ignore hidden courses | Yes or No | If set to Yes, users will not be enrolled in courses that are hidden (and thus unavailable to students) when the enrollments.csv file is processed or when the enroll API endpoint is used. |
Do not update course name
| Yes or No
| If "Yes", the course full name and course short name will not be updated on the update course process. |
Default course visibility | Inherit from course category, Hide, Show | The course visibility setting to use when creating new courses from the courses.csv file or the course API endpoint. |
External unenroll action | Unenroll user from course, Keep user enrolled, Disable course enrolment, Disable course enrolment and remove roles | What to do when a user is unenrolled from a course from the enrollments.csv file or the enroll API endpoint. |
User drop action | Keep user (ignore delete action), Suspend user, Full delete user | What to do when a user is marked as dropped or deleted in the users.csv file. Suspended users will no longer be able to access the Moodle site but their account and all of its data will still exist. Fully deleted users will lose all site data permanently. |
Unsuspend user on update
| Yes or No | If a suspended user is updated, should NexSIS automatically unsuspend the user? |
Control manual enrolments | Yes or No | Normally NexSIS can only unenroll users from courses if those users were initially enrolled with NexSIS. However, if you set this to ‘Yes’ then NexSIS can unenroll users that were manually enrolled in courses. |
Control other enrollment methods | Yes or No
| Normally NexSIS can only unenroll users from courses if those users were initially enrolled with NexSIS. However, if you set this to ‘Yes’ then NexSIS can unenroll users who were enrolled using other enrollment methods, excluding manual enrollments. |
Overwrite roles by default | Yes or No
| By default, when updating an enrollment, NexSIS will delete all existing roles before adding the specified role. Setting this to No will cause NexSIS to append the role instead, maintaining any existing roles when updating an enrollment. |
| Enable Ethos integration | Yes or No | Enables integration with Ellucian Ethos. See "Ethos" tab in NexSIS Settings after enabling for additional settings. This integration is deprecated and no longer recommended.
|
| Minimum File Age | Number of seconds | The minimum number of seconds since flat file was written to before NexSIS will allow processing. Having this set can prevent running a file too soon if it is actively being written to or uploaded to the server. |
Email if Error Occurs
| Supply one email address or a comma separated list of email addresses
| If supplied, allows a user or users to receive an email alert if a NexSIS issue is logged for level error and above. Supply one email address or comma separated list of email addresses. Each email address must be for a valid Moodle user. NexSIS could still fail in ways that do not log and trigger an email alert.
|
Files settings
The settings configured in the Files tab affect what NexSIS does every time the Enrollments file processing scheduled task is run.
In the Options/Example column of this table, normal font represents the list of available options you can select from. Italicized items represent an example of text that might be entered in the field. You may replace any of the italicized examples with your own text in order to customize your site's NexSIS plugin.
Setting | Options/Example | Explanation |
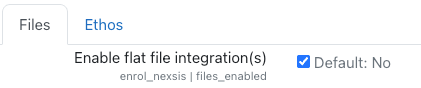
Enable flat file integration(s) | Yes or No | Set this to Yes in order to enable the "Enrollments file processing" (\enrol_nexsis\task\enrol_sync_task) scheduled task.
This must be set to yes for NexSIS to process uploaded files. |
File delimiter | Comma, Tab, Pipe | The symbol for the CSV files uploaded to NexSIS. |
Path to files | /mnt/saas-sftp01/home/clientname/incoming
| The location on the web server that NexSIS will search for incoming files to be processed.
If this field is blank, ask a Moodle US Infrastructure team member to fill it in correctly. |
Path to archive files | /path/to/archive/folder | The location on the web server, typically set to a file location within the SFTP directory, that NexSIS will save compressed archives of files that have already been processed.
If this field is blank, ask a Moodle US Infrastructure team member to fill it in correctly. |
Course | Options/Example | Explanation |
Course filename | courses.csv | The name of the CSV file containing course information NexSIS will search for.
Note: This value must exactly match the name of the file you upload to the server. |
Course ID column | courseid | The name of the column in the course CSV file containing the unique identifier for the courses.
This column must equal the value of the unique identifier selected for the Course ID field setting in the General tab (i.e. shortname or idnumber). |
Action column | Add, create, update | The name of the column in the course CSV file containing the action directive that should be performed on each row.
Values for this column must be selected from the available actions in the following Add actions and Drop actions fields. |
Add actions | add, create, update | The available values that can be supplied in the action column to perform the Add action.
Note: No matter which value from the list is supplied, the result is the same: if the course does not exist, it will be created; if the course already exists, it will be updated to match this row in the CSV file. |
Drop actions | drop, remove, delete | The available values that can be supplied in the action column to perform the Drop action.
No matter which value from the list is supplied, the result is the same: if the course exists, it will be deleted. |
User File | Options/Example | Explanation |
User filename | users.csv | The name of the CSV file containing user information NexSIS will search for.
This value must exactly match the name of the file you upload to the server. |
User ID column | userid | The name of the column in the user CSV file containing the unique identifier for the user.
This column must equal the value of the unique identifier selected for the User ID field setting in the General tab (i.e. idnumber, username, or email). |
Action column | action | The name of the column in the user CSV file containing the action directive that should be performed on each row.
Values for this column must be selected from the available actions in the following Add actions and Drop actions fields. |
Add actions | add, create, update | The available values that can be supplied in the action column to perform the Add action.
No matter which value from the list is supplied, the result is the same: if the user does not exist, it will be created; if the user already exists, it will be updated to match this row in the CSV file. |
Drop actions | drop, remove, delete, suspend | The available values that can be supplied in the action column to perform the Drop action.
No matter which value from the list is supplied, the result is the same: if the user exists, the User drop action from the General tab will be performed. |
Enrollment File | Options/Example | Explanation |
Enrollment filename | enrollments.csv | The name of the CSV file containing enrollment information NexSIS will search for.
This value must exactly match the name of the file you upload to the server. |
Enable Implicit Drops | Yes or No | If enabled, all existing enrollments in the Moodle site that do not appear in the enrollments CSV file will be automatically removed.
If disabled, NexSIS will only unenroll users when it encounters a row in the CSV file with a valid Drop action. |
User ID column | userid | The name of the column in the enrollment CSV file containing the unique identifier for the users.
This column must equal the value of the unique identifier selected for the User ID field setting in the General tab (i.e. idnumber, username, or email). |
Course ID column | courseid | The name of the column in the enrollment CSV file containing the unique identifier for the courses.
This column must equal the value of the unique identifier selected for the Course ID field setting in the General tab (i.e. shortname or idnumber). |
Role column | role | The name of the column in the enrollment CSV file containing the shortname for the role to be assigned to the user upon enrollment.
If this column is missing or blank, the Default role setting from the General tab will be applied. |
Action column | action | The name of the column in the enrollment CSV file containing the action directive that should be performed on each row.
Values for this column must be selected from the available actions in the following Add actions and Drop actions fields. |
Add actions | add, enrol, enroll | The available values that can be supplied in the action column to perform the Add action.
No matter which value from the list is supplied, the result is the same: if the enrollment does not exist, it will be created; if the enrollment already exists, it will be updated to match this row in the CSV file. |
Drop actions | drop, remove, unenrol, unenroll | The available values that can be supplied in the action column to perform the Drop action.
No matter which value from the list is supplied, the result is the same: if the enrollment exists, the External unenrol action from the General tab will be performed. |
Metalink File
| Options/Example | Explanation
|
Metalink filename
| metalinks.csv
| The name of the CSV file containing metalink information NexSIS will search for.
This value must exactly match the name of the file you upload to the server. |
Parent Course ID column
| parent_courseid_col
| The name of the column in the metalink CSV file containing the unique identifier for the parent course.
This column must equal the value of the unique identifier selected for the Course ID field setting in the General tab (i.e. shortname or idnumber). |
Metalink Course ID column
| metalink_courseid_col
| The name of the column in the metalink CSV file containing the unique identifier for the metalink course.
This column must equal the value of the unique identifier selected for the Course ID field setting in the General tab (i.e. shortname or idnumber). |
Action column
| action
| The name of the column in the metalink CSV file containing the action directive that should be performed on each row.
Values for this column must be selected from the available actions in the following Add actions and Drop actions fields.
If this column is not specified the Add action is assumed. |
| Add actions | add, create, update | The available values that can be supplied in the action column to perform the Add action.
No matter which value from the list is supplied, the result is the same: if the metalink does not exist, it will be created; if the metalink already exists, it will be updated to match this row in the CSV file. |
| Drop actions | drop, remove, delete | The available values that can be supplied in the action column to perform the Drop action.
No matter which value from the list is supplied, the result is the same: if the metalink exists, the metalink will be removed. |
Course Completion File
| Options/Example
| Explanation
|
| Course Completion File | course_completions.csv | The name of the CSV file containing course completion information NexSIS will search for.
This value must exactly match the name of the file you upload to the server. |
Job File (Moodle Workplace only)
| Options/Example
| Explanation
|
Job Filename
| jobs.csv | The name of the CSV file containing user job assignment information NexSIS will search for.
This value must exactly match the name of the file you upload to the server.
This option is available on Moodle Workplace only. |
| User ID column | userid | The name of the column in the job CSV file containing the unique identifier for the user.
This column must equal the value of the unique identifier selected for the User ID field setting in the General tab (i.e. idnumber, username, or email). |
| Postion ID column | postionid | The name of the column specifying the ID number of the position to be assigned to a user.
|
| Deparment ID column | departmentid | The name of the column specifying the ID number of the department to be assigned to a user. |
| Action column | action | The name of the column in the job CSV file containing the action directive that should be performed on each row.
Values for this column must be selected from the available actions in the following Add actions and Drop actions fields.
If this column is not specified the Add action is assumed. |
| Add actions | add, update | The available values that can be supplied in the action column to perform the Add action.
No matter which value from the list is supplied, the result is the same: if the user job assignment does not exist, it will be created; if the user job assignment already exists, it will be updated to match this row in the CSV file. |
| Delete actions | delete, drop, remove | The available values that can be supplied in the action column to perform the Delete action.
No matter which value from the list is supplied, the result is the same: if the job assignment exists, the job assignment will be deleted. |
Direct Manager File (Moodle Workplace only)
| Options/Example
| Explanation |
Direct Manger Filename
| direct-manager.csv | The name of the CSV file containing user direct manger information NexSIS will search for.
This value must exactly match the name of the file you upload to the server.
This option is available on Moodle Workplace only. |
| User ID column | userid | The name of the column in the direct manager CSV file containing the unique identifier for the user.
This column must equal the value of the unique identifier selected for the User ID field setting in the General tab (i.e. idnumber, username, or email). |
| Reports to User ID | reportsto_userid | The name of the column in the direct manager CSV file containing the unique identifier for the manager.
This column must equal the value of the unique identifier selected for the User ID field setting in the General tab (i.e. idnumber, username, or email). |
| Action column | action | The name of the column in the direct manager CSV file containing the action directive that should be performed on each row.
Values for this column must be selected from the available actions in the following Add actions and Drop actions fields.
If this column is not specified the Add action is assumed. |
| Add actions | add, create, update | The available values that can be supplied in the action column to perform the Add action.
No matter which value from the list is supplied, the result is the same: if the direct manager assignment does not exist, it will be created; if the direct manager assignment already exists, it will be updated to match this row in the CSV file. |
| Remove actions | remove, drop, delete | The available values that can be supplied in the action column to perform the Remove action.
No matter which value from the list is supplied, the result is the same: if the direct manager assignment exists, then the direct manager assignment will be removed. |
CSV file specifications
Before you send your CSV files to Moodle US's server or upload them through the NexSIS Files page, you'll need to make sure the files are in the proper format. Each of the five types of file has a certain set of required fields that must be included as well as optional fields that may be included, as per the NexSIS plugin settings above. The order of the fields does not matter. Each file must contain exactly one header row that lists the column headings.
User file
The default name for this file is "users.csv". Every row in the file defines a single user. The columns for the users.csv file are described in the table below.
Column | Required? | Description |
action | Yes | The action to be performed on the user record, e.g. add or delete. |
userid | Yes | The external system identifier for the user to create, update, or delete. |
username | Yes | The Moodle username for the user. |
firstname | Yes | The user's first name. |
lastname | Yes | The user's last name. |
email | Yes | The user's email address. |
idnumber
| No
| The user's id number. This field should be excluded if idnumber is configured as the User ID field in NexSIS settings.
|
auth | No | The user's authentication method. The value for this column should match the name of the proper authentication plugin without a plugin prefix. For example, to specify that a user should authenticate via the Simple SAML plugin (named auth_simplesaml), set this value to simplesaml. |
lang | No | The default language for the user. Use the name for the language pack found at Site Administration, then Language, and then Language packs (e.g. en_us). |
password | No | The user's password. |
url | No | The user's Web page profile field. |
institution | No | The user's Institution profile field. |
department | No | The user's Department profile field. |
address | No | The user's Address profile field. |
city | No | The user's City profile field. |
country | No | The user's Country profile field. |
icq | No | The user's ICQ profile field. |
skype | No | The user's Skype profile field. |
yahoo | No | The user's Yahoo profile field. |
aim | No | The user's AIM profile field. |
msn | No | The user's MSN profile field. |
phone1 | No | The user's Phone profile field. |
phone2 | No | The user's Mobile phone profile field. |
policyagreed | No | Whether the user has agreed to the site policy. This value should be either true or false. |
suspended | No | Whether the user is suspended from the site (meaning they cannot login). This value should either be 0 for not suspended or 1 for suspended. |
middlename | No | The user's Middle name profile field. |
alternatename | No | The user's Alternate name profile field. |
cohort0
cohort1
cohort2
cohort3
cohort4
cohort5
cohort6
cohort7
cohort8
cohort9
| No
| The user's cohort. Can supply up to 10 cohort columns, numbered 0-9, to match to multiple cohorts. First cohort matched must start with column cohort0 and increment by 1 for each additional cohort up to max of cohort9.
|
tenant
| No | Moodle Workplace only, tool_tenant plugin required. Specify the Tenant ID of the tenant to allocate the user to. |
You can also force users to change their passwords upon first login by adding the following additional field.
Column | Description |
changepassword | If set to 1, the user will be forced to change their password when they login for the first time. |
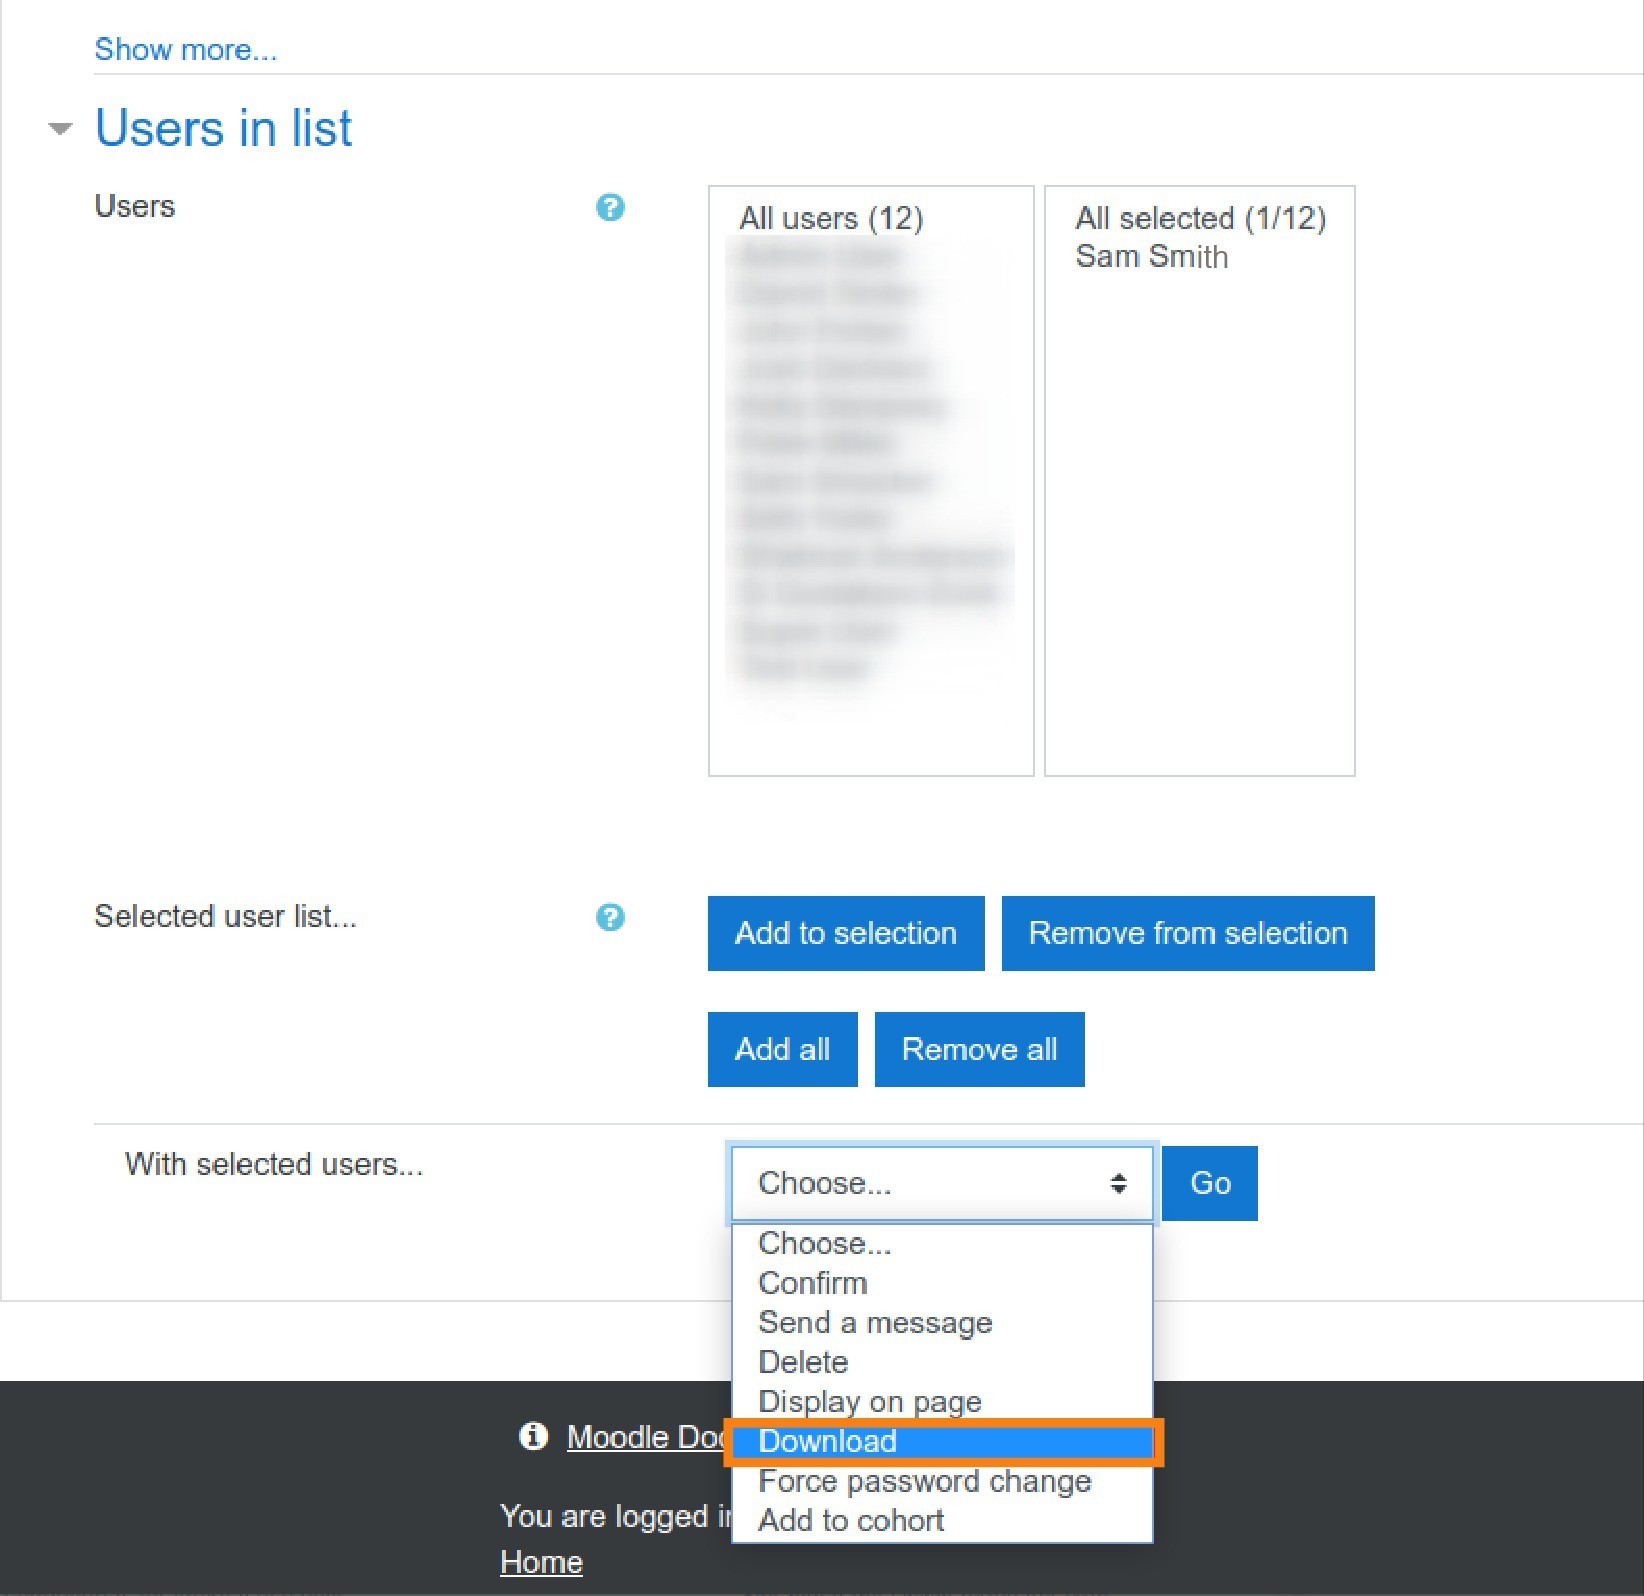
To determine the appropriate names to use for the column headings in the CSV file, you can download a CSV file with the correct headings for all fields in a user's profile by going to Site Administration, then Users, and then Bulk user actions, selecting at least one user, and choosing Download from the list of user actions.
It is possible to include custom user profile fields in your CSV files and update the values of those fields as well as the values of the default profile fields. In order to include custom user profile fields in the CSV, you will need to know the shortname value of the field. This is a unique identifier for the field, and it was determined when the profile field was created. To find this value, go to Site Administration, then Users, then Accounts, and then User profile fields, find the field in the list, click the gear icon in that field's row to go to its edit page, and you will see the Short name as the very first field on the page.

Once you have identified the custom profile field's shortname, you can include the field in your CSV files by creating a column named profile_field_shortname where “shortname” is the shortname value for the field. For example, in order to include the Fanciness level custom profile field from the screenshot above, you would need to create a column in the CSV file titled profile_field_fancy.
A sample users.csv file might look like this:
action,userid,username,firstname,lastname,email,auth
add,STU3141,samsmith,Sam,Smith,sam.smith@somewhere.com,ldap
delete,STU3176,sallysitwell,Sally,Sitwell,sally.sitwell@somewhere.com,ldap
Course file
The default name for this file is “courses.csv”. Every row defines a single course. The available columns for courses.csv are:
Column
| Required?
| Description
|
action | Yes | Action to perform on the course record, e.g. add or delete. |
courseid | Yes | The external system identifier for the course to create, update, or delete. |
fullname | Yes | The full name of the course. |
shortname | Yes | The shortened or abbreviated name for the course. |
idnumber | No | The ID number of the course. |
startdate | No | The start date and time of the course (in datetime format). |
enddate | No | The end date and time of the course (in datetime format). |
category | No | The category id number for the category the course belongs to. This should be the system ID, which can be referenced in the URL for the category. Use either this field, categorypath or category_idnumber field to specify the categorization of the course. |
categorypath | No | Where this course belongs in the category hierarchy (in uniform resource identifier or URI format). Use the full name of each course category, including spaces; if the course category does not already exist, it will be created. Use either this field, category or category_idnumber field to specify the categorization of the course. |
category_idnumber | No | The Category ID number field for the category the course belongs to. Use either this field, category, or categorypath field to specify the categorization of the course. |
format | No | Moodle course format to use for the course. This must be a valid course format plugin name. (i.e. weeks, topics) |
visible | No | Whether the course is visible or hidden. Enter 1 for visible and 0 for hidden. |
templateid | No | The identifier of a course template or shell to use when creating the course for the first time in Moodle.
This value must equal the value of the unique identifier selected for the Course ID field setting in the General tab (i.e. shortname or idnumber). |
summary
| No
| Moodle course summary to use for the course. The summary must be included on the same line of CSV file without any line breaks. |
It is possible to include and update course custom fields in your CSV files as well. In order to include course custom fields in the CSV, you will need to know the shortname value of the field. This is a unique identifier for the field, and it was determined when the course custom field was created. To find this value, go to Site Administration, then Courses, and then Course custom fields, find the field in the list, click the gear icon in that field's row to go to its edit page, and you will see the Short name as a field on the page.
Once you have identified the course custom field's shortname, you can include the field in your CSV files by creating a column named course_field_shortname where “shortname” is the shortname value for the field. For example, in order to update a course custom field with shortname "fancy", you would need to create a column in the CSV file titled course_field_fancy. This method can be applied to custom field types Checkbox, Date and time, Dropdown menu, Number, and Short text. For custom fields that are of the type Text area, pass a column named course_field_shortname_editor where "shortname" is the shortname value for the field. For the values passed in custom course fields of types Short text or Text area, pass the corresponding text. For values passed to course custom fields of type Number, the value must be a valid number. For values passed to course custom fields of type Date and time, pass a valid date in format YYYY-MM-DD. If including time, include the time after "T" (i.e. "2027-01-01T21:00:00"). For course custom fields of type Dropdown menu, pass the corresponding number corresponding to order the item appears in the custom dropdown. For example, if using a dropdown with items (apple, bannana, orange) pass the number 2 if the corresponding value should be bannana.
A sample courses.csv file might look like this:
action,courseid,fullname,shortname,startdate,categorypath
add,C554,Introduction to Psychology,PSYC101-01,2020-08-20T21:00:00,/Psychology
delete,C802,Artificial Intelligence II,COMP304-01,2020-08-20T21:00:00,/CompSci/Machine Learning
Enrollment file
The default name for this file is “enrollments.csv”. Each row of the file defines a single user enrollment for a single course. The available columns for this file are:
Column | Required? | Description |
action | Yes | Action to perform on the enrollment method (e.g. enroll or unenroll)
|
courseid | Yes | The external system identifier for the course to be enrolled in or unenrolled from. |
userid | Yes | The external system identifier for the user to be enrolled or unenrolled. |
roleid | Yes | The shortname of the role to be assigned to the user, e.g. student or teacher. |
groupname | No | The identifier of the group the user should be assigned to. If the group doesn't already exist, it will be created. |
timestart | No | The start date and time for the enrollment to take effect (in datetime format). |
timeend | No | The end date and time for the enrollment to take effect (in datetime format). |
A sample enrollments.csv file might look like this:
action,courseid,userid,roleid,timestart,timeend
enroll,C554,STU3141,student,,
unenroll,C802,STU3176,teacher,,
enroll,C557,STU3275,student,2023-01-01T00:00:00,2023-09-01T00:00:00
Note: The course meta link plugin (enrol_meta) must be installed and enabled as a valid enrollment method. Course meta links make it possible for users enrolled in one course to be automatically enrolled in one or more other courses. The default name for this file is “metalinks.csv”. Every row defines a single course meta link. The available columns for metalinks.csv are:
Column
| Required?
| Description
|
parent_courseid | Yes | Parent course identifier. |
metalink_courseid | Yes | Metalink course identifier. |
action | Yes
| Action to perform on the course meta link record, e.g., add or delete. |
group | No | Specify "none" for no groups, "new" to create a new group, or an existing Group ID Number to add to an existing group. |
groupname | No | For creating "new" groups only, specified by "new" value in the group column, specify the group name for the newly created group. |
groupid | No | For creating "new" groups only, specified by "new" value in the group column, specify the group id for the newly created group. |
A sample metalinks.csv file might look like this:
parent_courseid,metalink_courseid,action,group,groupname,groupid
Math1,Math2,add,new,Math Students,M1
Math1,Math3,add,M1,,
Science1,History1,add,none,,
Science1,Science2,delete,,,
Course Completion File
This file allows you to add a course completion timestamp for a user in a course if a course completion timestamp does not already exist for the user in the course. The default name for this file is “course_completions.csv”. The available columns for course_completions.csv are listed below.
Column
| Required?
| Description
|
timestamp_course_completion | Yes | Course Completion Timestamp |
userid | Yes | The external system identifier for the user that will have a course completion added.
|
courseid | Yes | The external system identifier for the course the user is enrolled in that will have a course completion added. |
A sample course_completions.csv file might look like this:
timestamp_course_completion,userid,courseid
2022-11-01T08:00:00.000Z,STU3141,C554
2022-11-05T09:30:00.000Z,STU1546,C551
Job File
This file allows you to manage job positions and departments for users. This feature is available for Moodle Workplace only. The default name for this file is “jobs.csv”. The available columns for jobs.csv are listed below. The columns listed are the default naming which can be adjusted in NexSIS settings in the Files tab under Job File.
Column
| Required?
| Description
|
userid | Yes | The external system identifier for the user that will have a job assigned.
|
positionid | Yes | The ID number of the position to be assigned to a user.
|
departmentid
| Yes
| The ID number of the department to be assigned to the user's position.
|
action | No
| Action to perform on the job assignment, e.g., add or delete. The add action is assumed if not specified. A job assignment is updated when add action is performed if the job assignment already exists for the user.
|
startdate
| No
| The start date of the job assignment. Date should be in YYYY-MM-DD format (e.g. 2024-05-31).
|
enddate | No | The end date of the job assignment. Date should be in YYYY-MM-DD format (e.g. 2024-05-31).
|
position | No | Specify "new" to create a new position, or update an existing position. |
positionname | No | For "new" position only, specify the position name. |
positionparent | No | For "new" position only, specify the parent id number for the position. If empty, NexSIS will create a top level position framework. |
globalmanager | No | For "new" position only, enable the manager permissions for the position. This option should be "1" or "0" and will default to "0" if not specified. |
gallocateteammemberstolearning | No | For "new" position only, enable the "Allocate team members to learning" permission for the manager. This option should be "1" or "0" and will default to "0" if not specified. |
| gviewextendedteamreports | No | For "new" position only, enable the "VIew extended team report" permission for the manager. This option should be "1" or "0" and will default to "0" if not specified. |
greceivenotifications | No | For "new" position only, enable the "Receive notifications" permission for the manager. This option should be "1" or "0" and will default to "0" if not specified. |
departmentmanager | No | For "new" position only, enable the department lead permissions for the position. This option should be "1" or "0" and will default to "0" if not specified. |
dallocateteammemberstolearning | No | For "new" position only, enable the "Allocate team members to learning" permission for the department lead. This option should be "1" or "0" and will default to "0" if not specified. |
dviewextendedteamreports | No | For "new" position only, enable the "View extended team reports" permission for the department lead. This option should be "1" or "0" and will default to "0" if not specified. |
dreceivenotifications | No | For "new" position only, enable the "Receive notifications" permission for the department lead. This option should be "1" or "0" and will default to "0" if not specified. |
department | No | Specify "new" to create a new department or update existing department. |
departmentname | No | For "new" department only, specify the department name. |
departmentparent | No | For "new" department only, specify the parent id number of the department. If empty, NexSIS will create a top level department framework. |
A sample jobs.csv file might look like this:
action,userid,departmentid,positionid,startdate,enddate,position,positionname,positionparent,globalmanager,gallocateteammemberstolearning,gviewextendedteamreports,greceivenotifications,departmentmanager,dallocateteammemberstolearning,dviewextendedteamreports,dreceivenotifications,department,departmentname,departmentparent
add,U123,it,itpos1,2024-01-05,2024-05-31,new,Position-1,,1,1,0,1,1,0,0,1,new,IT,
add,U123,it,itpos2,2024-06-01,,,,,,,,,,,,,,,,
delete,U456,it,itpos1,,
Direct Manager File
This file allows you to assign direct managers to users. This feature is available for Moodle Workplace only. The default name for this file is “direct-manager.csv”. The available columns for direct-manager.csv are listed below. The columns listed are the default naming which can be adjusted in NexSIS settings in the Files tab under Direct Manager File.
Column
| Required?
| Description
|
userid | Yes | The external system identifier for the user that will have a direct manger assigned.
The column name is based on the User ID column setting in Direct Manager File settings in NexSIS settings.
|
reportsto_userid | Yes | The external system identifier of the user that is the direct manger to be assigned.
The column name is based on the Reports to User ID setting in Direct Manager File settings in NexSIS settings.
|
action | No | Action to perform on the job assignment, e.g., add or delete. The add action is assumed if not specified. A direct manager is updated when add action is performed if the direct manager assignment already exists for the user.
The column name is based on the Action column setting in Direct Manager File settings in NexSIS settings.
The add actions are based on the Add actions setting in Direct Manager File settings in NexSIS settings. These default to "add, create, update". Specifying any one of these values will perform the add action.
The remove actions are based on the Remove actions setting in Direct Manager File settings in NexSIS settings. These default to "remove, drop, delete". Specifying any one of these values will perform the remove action. |
keepexisting | No | This option should be "1" or "0" and will default to "1" if not specified. If "1" this option will keep existing managers and add new ones. If "0" this option will replace existing managers. |
perm_allocate_programs | No | This option should be "1" or "0" and will default to "1" if not specified. If "1" this option allows permission to allocate managed users to programs and certifications. If "0" this option will deny permission to allocate managed users to programs and certifications. |
perm_view_reports | No | This option should be "1" or "0" and will default to "1" if not specified. If "1" this option allows permission to view reports on manged users. If "0" this option will deny permission to view reports on managed users. |
perm_be_notified | No | This option should be "1" or "0" and will default to "1" if not specified. If "1" this option allows permission to receive notifications on managed users. If "0" this option will deny permission to receive notifications on managed users. |
A sample direct-manager.csv file might look like this:
action,userid,reportsto_userid,keepexisting,perm_allocate_programs,perm_view_reports,perm_be_notified
add,U123,U234,1,1,1,1
add,U123,U235,0,1,0,0
delete,U444,U456,,,,
Program File
This file allows you to allocate users to programs. This feature is available for Moodle Workplace only. The default name for this file is “programs.csv”. The available columns for programs.csv are listed below. The columns listed are the default naming which can be adjusted in NexSIS settings in the Files tab under Program File.
| Column | Required? | Description |
| userid | Yes | The external system identifier for the user.
|
| programid | Yes | The ID number of the program to be assigned to the user.
|
action
| No | Action to perform: add or drop. The add action is assumed if not specified. An allocation is updated if it already exists.
|
startdate
| No | The start date of the program allocation. Date should be in YYYY-MM-DD format (e.g. 2026-05-31).
|
enddate
| No | The end date of the program allocation. Date should be in YYYY-MM-DD format (e.g. 2026-05-31).
|
duedate
| No | The due date of the program allocation. Date should be in YYYY-MM-DD format (e.g. 2026-05-31).
|
status
| No | The status of the allocation. Use 1 for Active or 0 for Suspended.
|
resetprogram
| No | The status of the allocation. Use 1 for Active or 0 for Suspended.
|
A sample programs.csv file might look like this:
action,userid,programid,startdate,duedate,enddate,status,resetprogram
add,U123,P123,2025-12-31T10:00:00,2026-12-31T10:00:00,2026-12-31T10:00:00,0,0
add,U124,P123,2025-12-31T10:00:00,2026-01-31T10:00:00,2026-02-10T10:00:00,1,0
delete,U125,P123,2025-12-31T10:00:00,2026-12-31T10:00:00,2026-12-31T10:00:00,0,0
Certification File
This file allows you to allocate users to certifications. This feature is available for Moodle Workplace only. The default name for this file is “certifications.csv”. The available columns for certifications.csv are listed below. The columns listed are the default naming which can be adjusted in NexSIS settings in the Files tab under Certification File.
| Column | Required? | Description |
| userid | Yes | The external system identifier for the user.
|
| certificationid | Yes | The ID number of the certification to be assigned to the user.
|
action
| No | Action to perform: add or drop. The add action is assumed if not specified. An allocation is updated if it already exists.
|
startdate
| No | The start date of the certificate allocation. Date should be in YYYY-MM-DD format (e.g. 2026-05-31).
|
duedate
| No | The due date of the certificate allocation. Date should be in YYYY-MM-DD format (e.g. 2026-05-31).
|
expirydate
| No | The expiry date of the certificate allocation. Date should be in YYYY-MM-DD format (e.g. 2026-05-31).
|
certifieddate
| No | The certified date of the certification allocation. Date should be in YYYY-MM-DD format (e.g. 2024-05-31).
|
suspendstatus
| No | The status of the allocation. Use 1 for Active or 0 for Suspended.
|
| revokedcertification | No | Set to 1 to revoke the user's current certification completion. |
A sample certifications.csv file might look like this:
action,userid,certificationid,startdate,duedate,expirydate,certifieddate,suspendstatus,revokedcertification
add,U123,C123,2025-12-31T10:00:00,2026-12-31T10:00:00,2026-12-31T10:00:00,2026-12-31T10:00:00,0,0
add,U124,C123,2025-12-31T10:00:00,2026-01-31T10:00:00,2026-02-10T10:00:00,2026-02-10T10:00:00,1,0
delete,U125,C123,2025-12-31T10:00:00,2026-12-31T10:00:00,2026-12-31T10:00:00,2026-12-31T10:00:00,0,0
File transfer
Once you have produced CSV files in the correct format, you'll need to transfer them to Moodle US's server. This can be done through secure file transfer protocol (SFTP method) or through using the NexSIS Files page to upload your files. To transfer the files via secure file transfer protocol (SFTP method) you will need credentials provided to you by Moodle US.
You will be given a directory where you can transfer your csv files. It is recommended that you create a scheduled task (using cron or a similar scheduling program) that sends the exported files from your SIS to Moodle US's SFTP server at regular intervals. You should keep the frequency of the scheduled task in mind - you do not want to have a situation where your task runs too frequently for the processing of the file which results in overwritten CSVs.
Once you have transferred the files to Moodle US's server, the NexSIS plugin completes the actions noted on the CSV files. In order to see notifications or error messages that arise while NexSIS imports the data to the Moodle site, you can go to Site administration > Reports > NexSIS logs. Please note that if you see an error that NexSIS has failed to import one of the files, NexSIS will simply retry importing the file next time it runs.
NexSIS Files Page
This page can be found by navigating to Site administration > Plugins > NexSIS Files. This page can be used as a File transfer method for uploading files to Moodle US's server. It can be used in addition to or as an alternative to secure file transfer protocol (SFTP). This page also shows the status of existing files in your file directory.
After the files have been uploaded, NexSIS processes and archives the files during its next scheduled sync. This can also be scheduled to run immediately by clicking either the "Run now" button or the "Schedule An Ad Hoc Task" button on the NexSIS FIles page after uploading one or more files. In order to see notifications or error messages that arise while NexSIS imports the data to the Moodle site, you can go to Site administration, then Reports, and then NexSIS logs. Please note that if you see an error that NexSIS has failed to import one of the files, NexSIS will simply retry importing the file next time it runs.
NexSIS Logs Page
In order to see notifications or error messages that arise while NexSIS imports the data to the Moodle site, you can go to Site administration > Reports > NexSIS logs.
NexSIS Web Service
A Moodle web service, enrol_nexis_file_upload, is available and can be used as an alternative to secure file transfer protocol (SFTP) or manual file uploads through the NexSIS Files Page. This method uploads a file into Moodle for processing through the enrol_nexsis_file_upload web service. This service supports both Base64-encoded uploads and multipart/form-data uploads.
This function requires a valid Moodle web service token. The token must belong to a user with sufficient permissions to use the Nexsis enrolment plugin.
Tokens can be generated from:
Site administration > Server > Web services > Manage tokens
Add as authorized users to “enrol_nexis_ws” from:
Site administration > Server > Web services > External Services
Endpoint
POST /webservice/rest/server.php
Required parameters
| Name | Type | Description |
| wstoken | string | Web service authentication token |
| wsfunction | string | Must be enrol_nexsis_file_upload |
| moodlewsrestformat | string | Response format (json or xml) |
| type | string | Type of file being uploaded
Supported values:- users
- courses
- enrollments
- metalinks
- course completions
- jobs
- direct managers
- programs
- certifications
|
Optional parameters
| Name | Type | Description |
| filecontent | string | Base64-encoded file content |
Either the filecontent parameter or a multipart file upload field named 'file' must be provided.
File upload handling
1. If filecontent is provided, it is Base64-decoded and written directly to the destination file.
2. If filecontent is not provided, the service checks for a multipart upload field named 'file' and saves it. It is recommended for large files
.
3. If neither is provided, a moodle_exception is thrown.
Example Request Base64 upload
curl --request POST \
'https://example.moodle.com/webservice/rest/server.php' \
--data-urlencode 'wstoken=<YOUR_TOKEN>' \
--data-urlencode 'wsfunction=enrol_nexsis_file_upload' \
--data-urlencode 'moodlewsrestformat=json' \
--data-urlencode 'type=courses' \
--data-urlencode 'filecontent=<BASE64_FILE_CONTENT>'
Example Request Multipart file upload (Large files)
curl --location \
'https://example.moodle.com/webservice/rest/server.php?wstoken=<YOUR_TOKEN>&wsfunction=enrol_nexsis_file_upload&moodlewsrestformat=json&type=courses' \
--form 'file=@"filename.csv"'
Returns
On success, the function returns:
Errors
The function may throw a moodle_exception.
{

  "exception": "moodle_exception",

  "errorcode": "error_upload_file_exists",

  "message": "File could not be uploaded. A file of this type already exists and is awaiting processing."

}
Notes
- Only one file per type may be queued for processing at a time.
- Uploaded files must match the expected format for the specified type.
NexSIS Resources Page
This page contains shortcuts to NexSIS Documentation, release notes, files, settings, and logs.
Release Notes
Release notes for NexSIS are available here. Some features are only available on the latest version of NexSIS. If you find that your site is not using the latest version of NexSIS, please reach out to your Support representative to request an update. This can be done by submitting a support ticket to Moodle.