User tours are typically used to initiate and engage new users by guiding them through essential parts of your Moodle site. In this tutorial you will learn how to set up a basic user tour.
Step 1
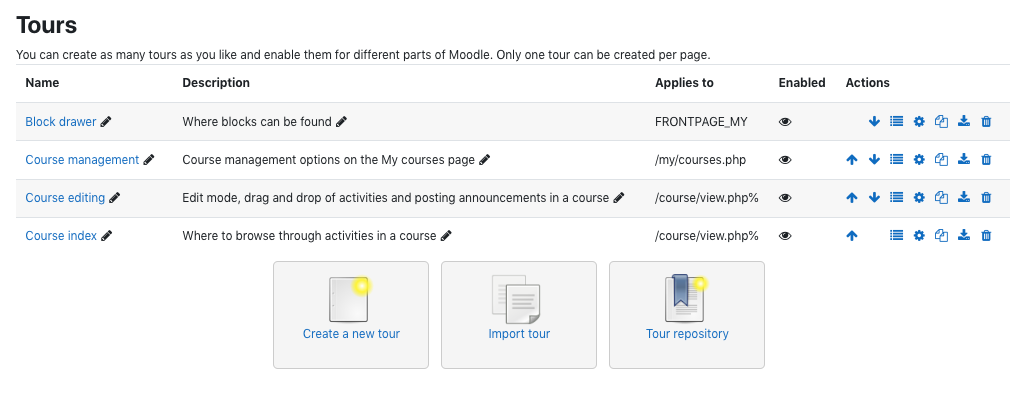
Log into Moodle as an Admin user, and go to Site administration > Appearance > User tours.

For each existing tour, click directly on its name, listed in the Name category, or in the or the View icon in the Actions column to view its listed steps on the tour settings page.
Each tour can be individually enabled or disabled in its settings page.
Step 2
Click the Create a New Tour option:
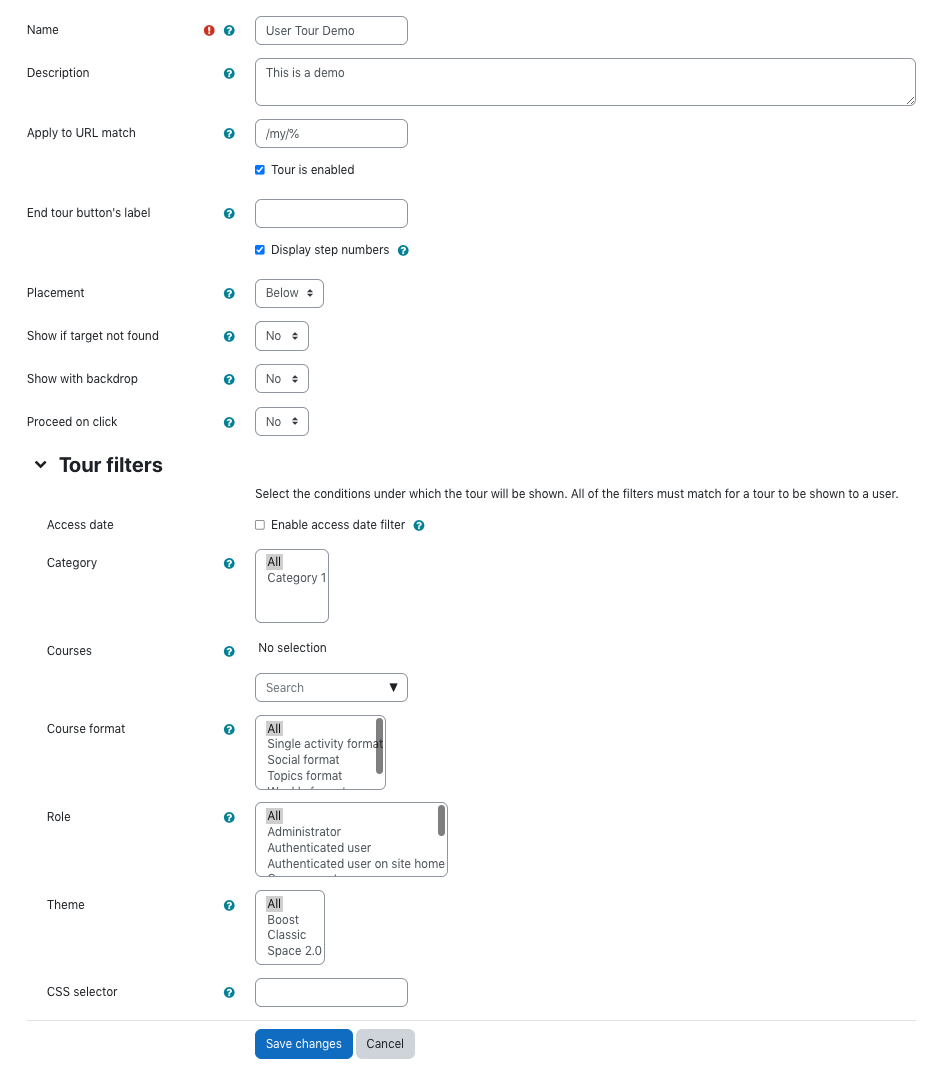
Complete the basic settings fields
Click the ? icon next to each settings field for help
Click Save Changes after completing the desired fields
Note: For this tutorial, the tour is going to be displayed on the “My dashboard” page for all users.

Step 3
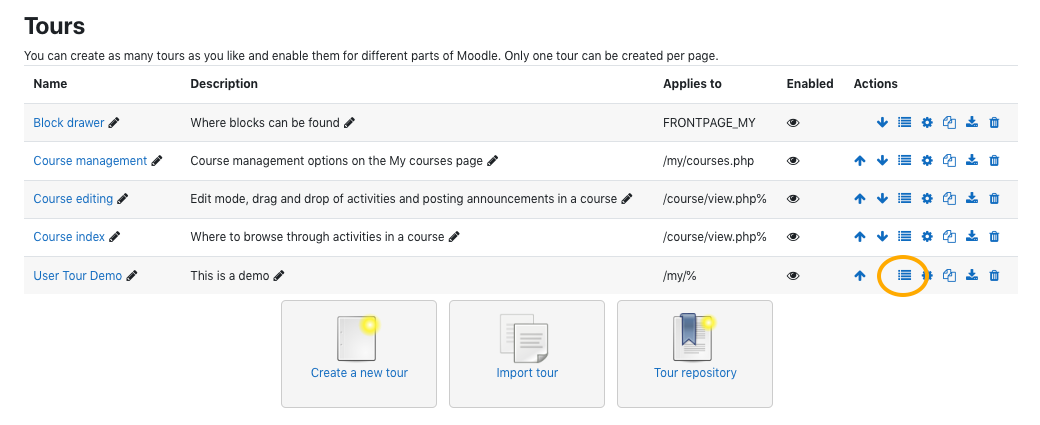
The empty tour shell is now listed in the tours table.
Click the Tour name or the View icon in the Actions column to get to the tour settings page

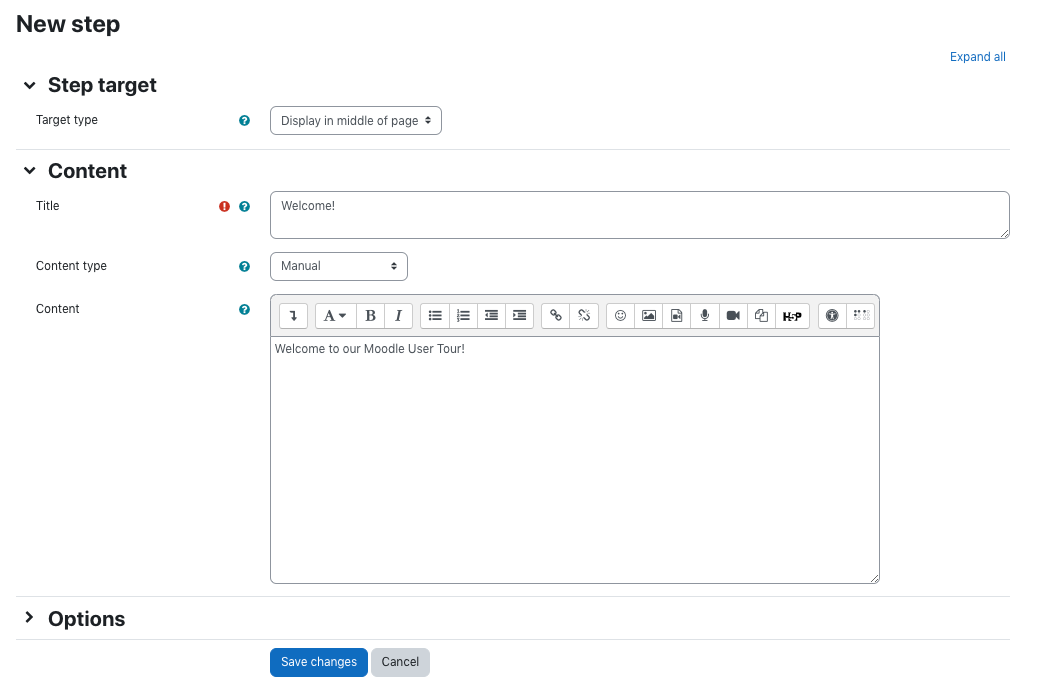
From the welcome box in the middle of the My Dashboard page, click New Step

Complete the blank settings fields

Click Save Changes before creating your next step
Closing Tips
Now you have successfully created a user tour. By default the tour will be shown to each user only once. To force the tour to be shown again, click the force the tour to be displayed link which is located on the tour settings page, in the page footer (question mark icon).

Multiple tours can be created and enabled for different parts of Moodle, but only one tour can be created per page.
In addition to creating a new user tour, you also have the option to import a tour or browse user tours on the User Tours Repository.
